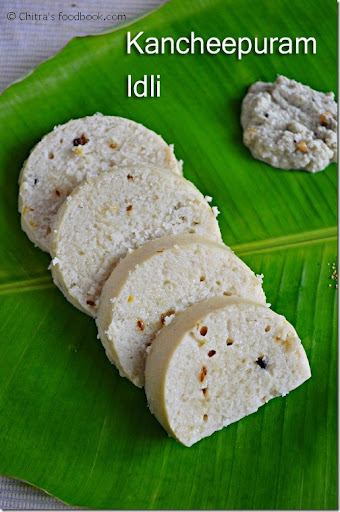
Kanchipuram Idli is one of the most popular South Indian Idli recipe that is originated from Tamilnadu – Kanchipuram Varadaraja Perumal temple’s madapalli. This idli is served as temple prasadam. Its a world famous idli. Recently I tried this Iyengar style idli recipe from ” The Hindu” food safari section. 3 different recipes were given there from the temple and hotels of Kancheepuram. Every time I used to follow my cook book recipe for making Kancheepuram Idli which I have mentioned below as recipe 2. This time I tried Kanjeevaram Varadaraja perumal temple recipe ( Koil idli). It came out really well.
We loved its taste.
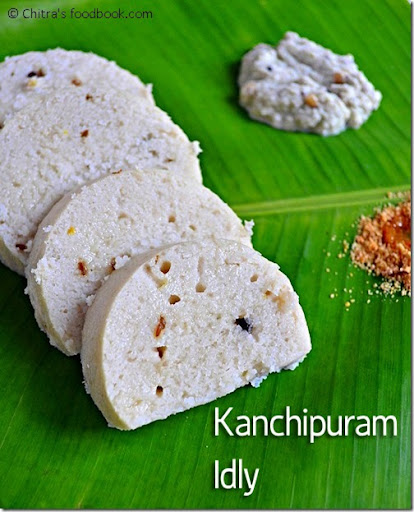
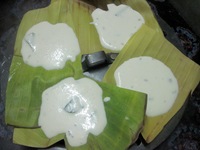
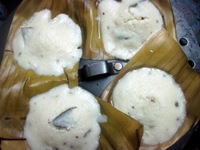
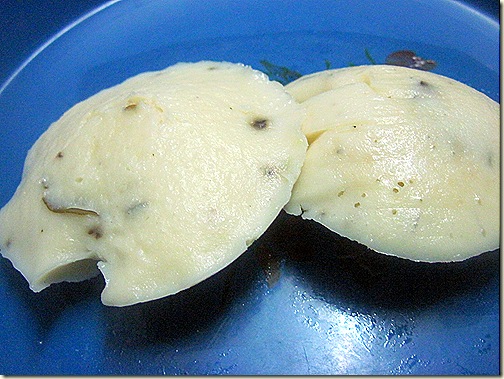
The specialty of this idli lies in steaming it using “Mandharai leaves” . But I used banana leaves here. I steamed the idli in a big tumbler lined with banana leaf. Normally the cooking time of idli takes 2 hours as they make in kudalai ( a hollow bamboo rod). So Its also known as kudalai idli and Kovil idli. But I used pressure cooker to steam idli. Also the consistency of batter should be slightly coarse and thick to get the above texture in the picture.
Remember one thing, you should eat it hot. Otherwise idli will become slightly hard when warm. If you grind it too smooth, it will resemble our usual idli but it comes out very soft even after it cools down. This idli tastes the best with coconut chutney and idli podi. I’ve had this with sambar too. But I feel coconut chutney is the best side dish. My husband loves this idli a lot. With the pleasant aroma of steamed banana leaves, it tastes delicious & very soft .
Try it and let me know how it tasted. Lets see how to prepare Kanchipuram idli using two different recipes.
Kanchipuram Idli Recipe
 How to make Kanchipuram idli – 2 recipes shared here
Cuisine: Indian
Category: Breakfast
Serves:4
Prep time: 16H(with fermentation)
Cook time: 20 Min
Total time: 16H20Min
INGREDIENTS
1 cup – 250ml
Recipe 1 – Temple version
Recipe 2 – Cookbook version
|
HOW TO MAKE KANCHIPURAM IDLI – METHOD
Note
- As per the original recipe, the batter should be ground till coarse(rava consistency). But most of the time I grind the batter smooth. U ‘ll get a really soft idli !! My family likes that way.



Love to eat it with coconut chutney…..Looks very tasty & soft
so soft and different!…yummy!
yummy idli
Thanku all for the quick sweet comments 🙂
Crystal clear picture! Should try all soon.thanks for posting!
Idlis on banana leaf…interesting.
A very different iddly to be steamed with banana leaves pa..will surely try them if I get hold some banana leaves here..
This is a nice looking idli… b'cuz I loved the different texture of it in the pic…. And done differently too…. Hot hot idlis with chutney…I can only shout "Break it fast"!!!!!
I think this post came after a long time…. I hope all's well…..
Happy Celebrations!!!
Ash….
(http://asha-oceanichope.blogspot.com/)
Wat a delicious, soft idli, had these idlies long back…Looks too marvellous CHitra..
oh wow!!! thats a perfect and yummy idli…
You are right- it is better with coconut chutney- Good one!
I can almost smell the flavor steamed leaves and idli together. It must surely be heavenly.. should try it soon.
I love it for d flavors…looks gr8..never steamed them in banana leaves..will try next time..f
I never knew that kanjivaram idlis were steamed in banana leaves. I can almost imagine how good it would smell.
Cute and delicious idli.
Healthy and delicious idly
lovely pics, i got introduced this idly after marriage, but never knew they were made in banana leaves!!, well, if i ever get hold of them here i will try!!
nice idlis, it's been a year since I ate them; I love it with coconut chutney but also very much with thuvayals 🙂
Yummy idlis!! Love to have them with coconut chutney! 🙂
idli with coconut chutney makes them so delitable dear.ur idlies look perfect dear.
Perfect and soft idili..Yummy with chutney!!
Well, heard this name over and over and little did I know this is how it looks..Yummy!
you wont believe that ive never had this before…but ive heard soo much about it that i wanna try it now!!
mmm. looks sooo soft and yummy Chitra!!
Nice idlis…I have never tried steaming idlis in banana leaf…thanks for the great recipe 🙂
yummy!
Idly with flavor of banana leaf, Loves to eat with tomato thokku
very tasteful idlis Chitra. I love them with milagu kuzhambu.
Looks so delicious. Hot idlis with chutney and sambar.
Good one, we love Kanchipuram idlies
This is my all time favorite Chitra. I add little turmeric and chopped coconut pieces. Ur version looks yummy and good!
Looks delicious!
http://padhuskitchen.blogspot.com/
The idli looks supple and delicious.. one of my favourites..
Hello,
Joy Of Cooking Forums is a discussion forum for food bloggers
to Announce/Share various Food Events,Awards,Achievements,
Website updates/changes,Domain changes,New website/venture launch and much more.
Please Join My Forum
http://cooking.diggwebb.com/
Greatly appreciate your support…
Tresa Augustine
Owner Of http://www.4yourtastebuds.com/
email:4yourtastebuds@gmail.com/simita84@gmail.com
(I have provided a direct link to forums
from my site too.)
nothing can beat these idlis… flavor packed!
These look AMAZING! I would love them for my dinner tonight. Thanks for visiting my blog Chitra 🙂 Do come back often. I look forward to following you!
Sanjana x
Thank you chitra I can decide this dish as my son lunch box recipe.
Lovely way of doing kanchipuram idly….i can feel the banana leaf smell on idly….
lovely recipe i was searching it….thank u..i will try n let you know the result
which of the above two is Varadaraja Perumal Koil recipe?
also, do you use the weight for the pressure cooker ?
Hi its the first re cipe.no need to use weight valve.cook in low flame like. Cake baking.make sure there is enough water.
thanks